


A Practical Framework for Hardware Quality Control When Sourcing from China
Applicable Buyers
This guide is for importers, procurement professionals, and engineers sourcing case hardware from China. Whether you are buying latches, hinges, handles, or corner protectors, quality control failures are among the most costly problems in international sourcing. This guide provides a comprehensive framework for material verification, surface finish inspection, load testing, factory audits, and a practical 7-point QC checklist for every shipment.
Key Finding: Many importers encounter preventable quality issues in their early years of sourcing. The three most common defects are material substitution, inconsistent surface finishes, and load test failures. Each is preventable with proper inspection protocols: XRF or chemical testing for material verification, golden samples and gloss meters for surface finish consistency, and universal testing machines for load validation. Third-party inspection during production – not just at pre-shipment – is the single most effective quality control investment an importer can make. This guide provides a complete framework from factory selection to shipment release.
Material substitutions, inconsistent surface finishes, and load test failures are the top quality concerns in hardware sourcing from China. This guide provides a comprehensive, practical quality control framework that separates reliable shipments from costly rework.
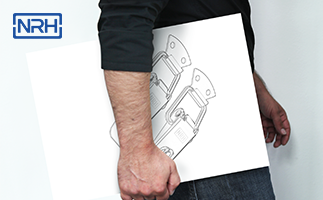
Figure 1: Quality control inspector verifying hardware material composition using XRF spectrometry on case hardware components. (Image source: NRH Box Hardware)
Why Quality Control Fails in China Hardware Sourcing
Most QC failures trace back to three root causes: misaligned specifications, inadequate inspection protocols, and supplier-side material substitution. Understanding these root causes is the first step to building a robust quality control program.
1. Specification Gaps
Specification gaps happen when buyers share only a product image or a vague description. Factories fill the blanks with their own interpretations. A “stainless steel latch” could mean SUS304, SUS201, or SUS430 – each with vastly different corrosion resistance and cost. A “chrome-plated finish” could mean decorative chrome (thin, cosmetic only) or industrial hard chrome (thick, wear-resistant). A “40kg load rating” could mean static load or dynamic load – two very different tests.
Preventive action: Provide complete engineering drawings with material callouts, finish specifications, and test criteria. Reference international standards (ISO, ASTM) for test methods. Never rely on verbal descriptions or photographs alone.
2. Inadequate Inspection Protocols
Inadequate inspection means relying on photos or ship-sample approvals instead of systematic checks during production. A single pre-shipment snapshot cannot confirm batch consistency across thousands of units. Yet many importers approve shipments based on a single golden sample and a few photographs – a recipe for disaster.
Preventive action: Implement a three-stage inspection protocol: pre-production (material verification), during-production (process monitoring), and pre-shipment (finished goods validation). Do not skip the during-production stage.
3. Material Substitution
Material substitution is one of the most damaging failure modes. Some suppliers may swap higher-grade materials for lower-grade alternatives to cut costs. The parts may look identical to the naked eye. The difference shows up later – when rust appears on installed hardware, or when parts fail under load.
Preventive action: Verify material composition at two stages: incoming raw material before production starts, and finished goods before shipment. Use XRF spectrometry or chemical testing for verification.
Building a robust QC process requires understanding what to check, when to check it, and which tools deliver reliable results. The following sections provide a complete framework.
Part 1: Selecting the Right Supplier
Quality control begins before the first order is placed. Selecting the right supplier is the most important quality decision you will make. A good supplier with clear communication and documented processes will produce consistent quality. A poor supplier will require constant intervention and correction, regardless of your inspection efforts.
Supplier Qualification Checklist
| Qualification Item | What to Verify | Red Flags |
|---|---|---|
| Business Registration | Valid business license, registered address, legal representative | Multiple name changes, trading company posing as factory |
| Factory Visit | Physical plant visit or video tour, equipment condition, production capacity | Refusal to show production floor, rented/empty facilities |
| Quality Management System | ISO 9001 certificate covering the production site, documented quality procedures | Certificate expired or scope does not include your product category |
| Reference Customers | Contact references, review product quality from existing customers | No references provided, references unreachable |
| Production Capacity | Monthly output capability, lead times, capacity for your order volume | Over-promising capacity, vague production scheduling |
| Testing Capability | In-house testing equipment (load testers, calipers, gauges, salt spray chamber) | No testing equipment, reliance on “experience” only |
Supplier Audit Protocol
Phase 1 – Desktop Audit: Review business license, ISO certificate, customer references, and product samples. Request a full product catalog and price list. Verify the company’s registered address matches the actual factory location.
Phase 2 – On-site Audit: Visit the factory (or conduct a video audit). Check equipment maintenance records, material storage conditions, inspection documentation, and production floor organization. Speak with quality control personnel, not just sales staff.
Phase 3 – Sample Evaluation: Request engineering samples before placing a production order. Test samples for material composition, dimensions, load capacity, and surface finish. Document all test results as a baseline for future production batches.
Phase 4 – Trial Order: Place a small trial order (typically 10-20% of planned volume) before committing to full production. Use this order to validate the supplier’s production process, quality control system, and shipping reliability.
Part 2: Material Verification
Material verification is the most critical quality control step in hardware sourcing. The cost difference between grades creates strong incentives for substitution. Without proper verification, you cannot confirm that your hardware will perform as specified.
Common Material Grades in Case Hardware
| Material | Typical Applications | Key Properties | Risk of Substitution |
|---|---|---|---|
| SUS304 | High-end latches, handles, hinges | Excellent corrosion resistance, 8-10.5% nickel | High (often substituted with SUS201) |
| SUS201 | Lower-cost alternatives, indoor use | Lower corrosion resistance, 1-1.5% nickel | N/A (used as substitute for SUS304) |
| Iron + Chrome Plating | Cost-effective latches, corner protectors | Good strength, plating-dependent corrosion resistance | Medium (plating thickness/thinness) |
| Zinc Alloy | Die-cast handles, latches | Good castability, moderate strength | Medium (alloy composition variations) |
Verification Methods
1. XRF Spectrometry (Handheld Analyzer) – Recommended
A handheld X-ray fluorescence analyzer reads elemental composition in seconds. Point the device at the part and read the nickel percentage. SUS304 typically shows 8-10.5% nickel, while SUS201 shows under 1.5%. This is the fastest and most accurate field method. While the equipment is costly, third-party inspection firms carry it as standard equipment, making it accessible for importers at per-use cost.
2. Chemical Reagent Test – Screening Tool
A drop of specific reagent on the metal surface produces different color reactions for different alloys. This method is low-cost and quick. It can serve as a useful screening tool to identify materials that clearly do not match the specified grade. For definitive verification, follow up with XRF or laboratory analysis on a random sample.
3. Material Test Report (MTR) Cross-Check
Request a mill test certificate (MTC) from the factory. Then verify the certificate against the physical material using XRF or chemical testing. MTRs alone are not completely reliable – they document the raw material as purchased, not what actually ends up in your product. Treat MTRs as a baseline, not sole verification.
Best practice: Verify material at two stages: incoming raw material before production starts, and finished goods before shipment. This provides end-to-end assurance.
Part 3: Surface Finish and Treatment Inspection
Surface finish defines both the appearance and the corrosion resistance of case hardware. Three common problems arise: wrong finish type, inconsistent quality across a batch, and plating defects on treated parts.
Common Surface Finishes in Case Hardware
| Finish | Characteristics | Common Defects | Inspection Method |
|---|---|---|---|
| Mirror Polish | High reflectivity, premium appearance | Scratches, pitting, inconsistent gloss | Visual under inspection lamp, gloss meter |
| Vibratory Finish | Matte, uniform, hides minor scratches | Uneven coverage, media residue | Visual, touch inspection |
| Chrome Plating | Bright, corrosion-resistant, durable | Blistering, peeling, discoloration, rust-through | Visual, cross-hatch adhesion test (ISO 2409) |
| Zinc Plating | Sacrificial corrosion protection, cost-effective | Uneven coverage, white rust, thin plating | Visual, thickness gauge |
| Electrophoretic Coating (BK2) | Uniform black coating, good corrosion resistance | Uneven thickness, pinholes, edge coverage | Visual, thickness gauge |
Inspection Protocol
Wrong Finish Type: Compare parts against an approved golden sample under consistent lighting. A gloss meter can provide quantifiable readings to support visual assessment and remove subjective judgment from the inspection. If you order mirror polish and receive vibratory finish, the parts function correctly but look wrong – a problem if your end customer expects a premium appearance.
Inconsistent Finish Across a Batch: Even when the correct finish is applied, batch inconsistency is common. The first units may receive full processing time, while the operator shortens the cycle for later units to meet a deadline. Random sampling catches this. Pull samples from different points in the production run – beginning, middle, and end – and compare them against the golden sample. Gloss meters or surface roughness testers provide objective measurements to support visual comparison.
Plating Defects: Common defects to check for include:
- Blistering: Air trapped under the plating layer creates raised bubbles. Run your fingernail across the surface – blisters catch and feel raised.
- Peeling: Poor adhesion between the base metal and the plating layer. A cross-hatch adhesion test (ISO 2409) can confirm plating integrity.
- Color variation: Inconsistent current density during plating can cause uneven tint on different areas of the same part.
- Rust-through at edges: Plating can thin at sharp edges, exposing the substrate. Check edges and corners specifically.
Salt Spray Testing (ASTM B117): Validates plating durability. Industry standards typically specify minimum hours for neutral salt spray testing on different plated finishes. If the factory cannot provide test results, commission an independent test before approving a new supplier.
Part 4: Load Testing and Dimension Tolerances
Load ratings exist for a reason. A latch that fails under load creates safety hazards and warranty claims. Dimension tolerances determine whether parts fit correctly in the field. This section provides practical protocols for both.
Load Testing Protocols
Verifying load ratings requires a calibrated universal testing machine (UTM), not a manual pull test.
Proper load test protocol:
- Sample size: Test a minimum of 3 units per batch. For batches over 5,000 units, test 5.
- Test speed: Apply load at a controlled rate (typically 10mm/min for hardware). Sudden impact testing is a separate test – do not confuse the two.
- Pass criteria: The latch must hold the rated load for a minimum of 30 seconds without permanent deformation or failure. Record the actual break load if failure occurs.
- Documentation: Photograph the test setup, the load curve, and the failure mode. This data supports warranty claims and supplier negotiations.
Common load test failures and root causes:
| Failure Mode | Description | Root Cause | Corrective Action |
|---|---|---|---|
| Spring Fatigue | Holds initially but deforms under sustained load | Incorrect spring material or insufficient heat treatment | Upgrade spring material, verify heat treatment records |
| Rivet Shear | Rivet connecting latch body to bracket shears under tension | Undersized rivet or incorrect material | Use correct rivet size and material grade |
| Catch Disengagement | Latch arm bends enough to release under load | Insufficient material thickness or soft material | Increase gauge thickness, verify material hardness |
| Bracket Deformation | Mounting bracket bends or twists under load | Thin base material or insufficient reinforcement | Add reinforcement ribs, increase material thickness |
Dimension Tolerances
Dimension issues cause more field complaints than load failures. A latch that is 0.5mm too wide will not fit the cutout. A hinge with misaligned holes cannot be installed without re-drilling. Even minor dimensional deviations can cause major installation problems in the field.
Typical tolerances for case hardware:
| Dimension Type | Typical Tolerance | Inspection Tool |
|---|---|---|
| Mounting hole centers | ±0.2mm | Digital caliper (0.01mm resolution) |
| Overall length/width | ±0.3mm | Digital caliper or micrometer |
| Hinge pin diameter | ±0.1mm | Micrometer |
| Mounting hole diameter | ±0.15mm | Digital caliper |
| Flatness (bracket surface) | ±0.3mm | Straight edge, feeler gauge |
Inspection protocol: Use digital calipers (resolution 0.01mm) for all dimension checks. Measure at least 10 units per batch across critical dimensions. Record results in a dimensional inspection report and compare against the drawing. Flag any dimension that falls outside tolerance – do not accept “close enough.”
Part 5: A Practical 7-Point QC Checklist
Use this checklist for every hardware order from China. Adjust sample sizes based on order volume and supplier history. For new suppliers, follow the full 7-point protocol. For established suppliers with a proven quality track record, you may reduce sampling frequency while maintaining the same inspection points.
| Stage | What to Check | Tools Required | Pass Criteria | Frequency |
|---|---|---|---|---|
| 1. Raw Material Verification | Material certificates + physical composition test | XRF analyzer or reagent test kit | Composition matches specification | Each new material lot |
| 2. First-Off Sample Approval | Critical dimensions, finish, function | Digital calipers, golden sample | All specs within tolerance, matches golden sample | First 5 units of production run |
| 3. In-Process Surface Finish | Finish consistency across batch | Golden sample, gloss meter (optional) | Consistent with golden sample | Pull 5 samples from beginning, middle, end |
| 4. In-Process Dimensional Check | Critical dimensions on production units | Digital calipers (0.01mm) | All within drawing tolerance | 10 units per batch |
| 5. Pre-Shipment Load Test | Rated load capacity verification | Universal testing machine | Hold rated load for 30 seconds | 3 units per batch (5 if over 5,000 units) |
| 6. Pre-Shipment Plating Adhesion | Plating integrity (chrome/zinc parts) | Cross-hatch cutter, tape | ISO 2409 Class 0 or 1 | 2-3 units per batch |
| 7. Final Visual and Packaging Inspection | Visual defects, labeling, packaging | Inspection lamp, 10x loupe | Within AQL limits, correct labeling | AQL sampling per ISO 2859-1 |
Key rule: Never skip the in-process checks. Waiting until pre-shipment to discover a material or process error means the entire batch is defective. Early detection allows correction while the production line is still running.
Third-party inspection: If you cannot maintain staff in China, hire an inspection firm. A during-production inspection costs a few hundred dollars and prevents far larger losses from defective shipments.
Part 6: Common Quality Pitfalls and How to Avoid Them
| Pitfall | Why It Happens | Consequence | Prevention |
|---|---|---|---|
| Material Substitution | Supplier cost-cutting, insufficient specification detail | Premature corrosion, load failure, product recalls | XRF verification at raw material and finished goods stage |
| Inconsistent Surface Finish | Variable processing time, operator shortcuts | Customer complaints, rejected shipments | Golden sample, in-process sampling, gloss meter |
| Plating Defects | Poor bath chemistry, insufficient cleaning, thin plating | Rust, peeling, adhesive failure | Cross-hatch test, salt spray test |
| Dimension Drift | Tooling wear, temperature variation, mold aging | Field installation problems, rejected parts | In-process dimensional checks, regular tooling maintenance |
| Inadequate Packaging | Cost-cutting, insufficient protection during shipping | Damaged parts, scratches, corrosion during transit | Packaging specification, drop test, final packaging check |
Part 7: When and How to Use Third-Party Inspection
Third-party inspection is one of the most effective quality control investments an importer can make. Here is a practical guide to when and how to use it.
When to Use Third-Party Inspection
- New supplier relationship: First 2-3 orders with a new supplier should always include third-party inspection.
- Large-volume orders: When the value of a single shipment exceeds $10,000, third-party inspection is a sound investment.
- Distance or travel restrictions: If you cannot visit the factory yourself, third-party inspection provides the next best alternative.
- Quality concerns: If a previous shipment had quality issues, include third-party inspection on the next order.
- Critical application: If the hardware will be used in safety-critical or high-value applications, third-party inspection is recommended.
Inspection Stages
During-Production Inspection (DPI): The most valuable inspection stage. The inspector visits the factory while production is underway, checks raw materials, monitors processing, and verifies first-off samples. If issues are found, they can be corrected before the entire batch is completed.
Pre-Shipment Inspection (PSI): The inspector visits after production is complete, before goods are packed for shipment. This is the final opportunity to reject defective goods before they leave the factory.
Container Loading Supervision (CLS): The inspector verifies that the correct goods are loaded into the correct container and that loading is done properly to prevent damage during transit.
Costs: A typical inspection costs $200-500 per visit depending on location and scope. This is a small investment compared to the cost of a defective shipment.
Key Takeaways
- Material verification is non-negotiable. Lower-grade materials may look identical to specified grades but fail in corrosive environments. Always verify with proper testing tools – visual inspection is not enough.
- Surface finish consistency is as important as material quality. Use golden samples and, where appropriate, gloss meters or surface roughness testers to verify batch consistency.
- Load testing requires calibrated equipment. A universal testing machine, not a manual pull test, is required for accurate load rating verification.
- Dimension tolerances cause more field complaints than load failures. Check mounting hole centers, hole diameters, and overall dimensions with precision measuring tools. Small deviations cause major installation problems.
- Inspect during production, not just before shipment. Early detection allows correction while the line is still running. Pre-shipment-only inspection means the entire batch may already be defective.
- Third-party inspection is a cost-effective investment. A few hundred dollars during production can prevent tens of thousands in losses from defective shipments.
- Supplier selection is the first line of quality defense. A good supplier with documented processes will produce consistent quality. A poor supplier will require constant intervention regardless of inspection.
- Document everything. Keep test reports, inspection records, and photographs. This data supports warranty claims, supplier negotiations, and continuous quality improvement.
Frequently Asked Questions
How do I verify stainless steel grade without expensive equipment?
Use a chemical reagent test as a screening tool. It can help identify materials that clearly do not match the specified grade by color reaction. For definitive verification, follow up with XRF testing or laboratory analysis on a random sample. XRF testing is typically available through third-party inspection firms at per-use cost.
What AQL level should I use for hardware inspection?
AQL 1.0 for critical defects (material, load rating, safety) and AQL 2.5 for major defects (surface finish, dimensions outside tolerance). Use AQL 4.0 for minor cosmetic issues. Reference ISO 2859-1 for sampling plans based on lot size.
How often should I audit a Chinese hardware factory?
Initial audit before placing the first order. Follow-up audit annually for ongoing suppliers. Trigger an immediate audit if defect rates exceed acceptable levels or if you receive customer complaints about material quality.
Can I trust factory-provided material test reports?
Partially. An MTR confirms the raw material purchased, not necessarily the material installed in your product. Always cross-check MTR data against physical testing of finished goods. MTRs are useful as a baseline but not as sole verification.
What is the standard salt spray test duration for plated hardware?
Industry standards typically specify minimum hours for neutral salt spray testing on different plated finishes. For specific requirements, consult your product specification or applicable industry standard (ASTM B117, ISO 9227).
How many samples should I test per batch?
For load testing: minimum 3 units per batch, 5 for batches over 5,000. For dimensional checks: 10 units across critical dimensions. For visual inspection: follow AQL sampling tables based on lot size – typically 50-80 units for a 5,000-piece order at AQL 2.5.
What are the most common quality pitfalls when sourcing case hardware from China?
Material substitution, inconsistent surface finish across a batch, plating defects on chrome iron parts, dimension drift as tooling wears, and inadequate packaging leading to in-transit damage. Each is preventable with proper inspection protocols.
Should I hire a third-party inspection company?
Yes, if you cannot maintain staff in China or if order values justify the investment. A during-production inspection typically costs $200-500 and catches issues while they are still correctable. Compare this cost to the potential losses from a defective shipment.
How do I handle a rejected shipment?
Document the defects with photographs and test results. Notify the supplier immediately with specific rejection reasons. Negotiate rework, replacement, or credit. Consider whether to accept the shipment with a discount or reject it entirely. Keep records for future supplier evaluation.
What is the difference between static load and dynamic load testing?
Static load testing applies a constant force to measure holding capacity. Dynamic load testing applies sudden or cyclical force to simulate real-world impact and vibration. The two tests measure different properties – do not confuse them. Specify which test you require on your purchase order.
Need help choosing? Quality control starts with selecting the right hardware for your application. Contact NRH Box Hardware for technical support, material verification, and product selection guidance:
TEL & WhatsApp & WeChat: +86 180 1797 5137
E-MAIL: nrh-gz@nrh.cn
ADD: Room 1703-1704, Zhongji Building, No. 819 Yinxiang Road, Nanxiang Town, Jiading District, Shanghai, China